

Classic DIY Vent System
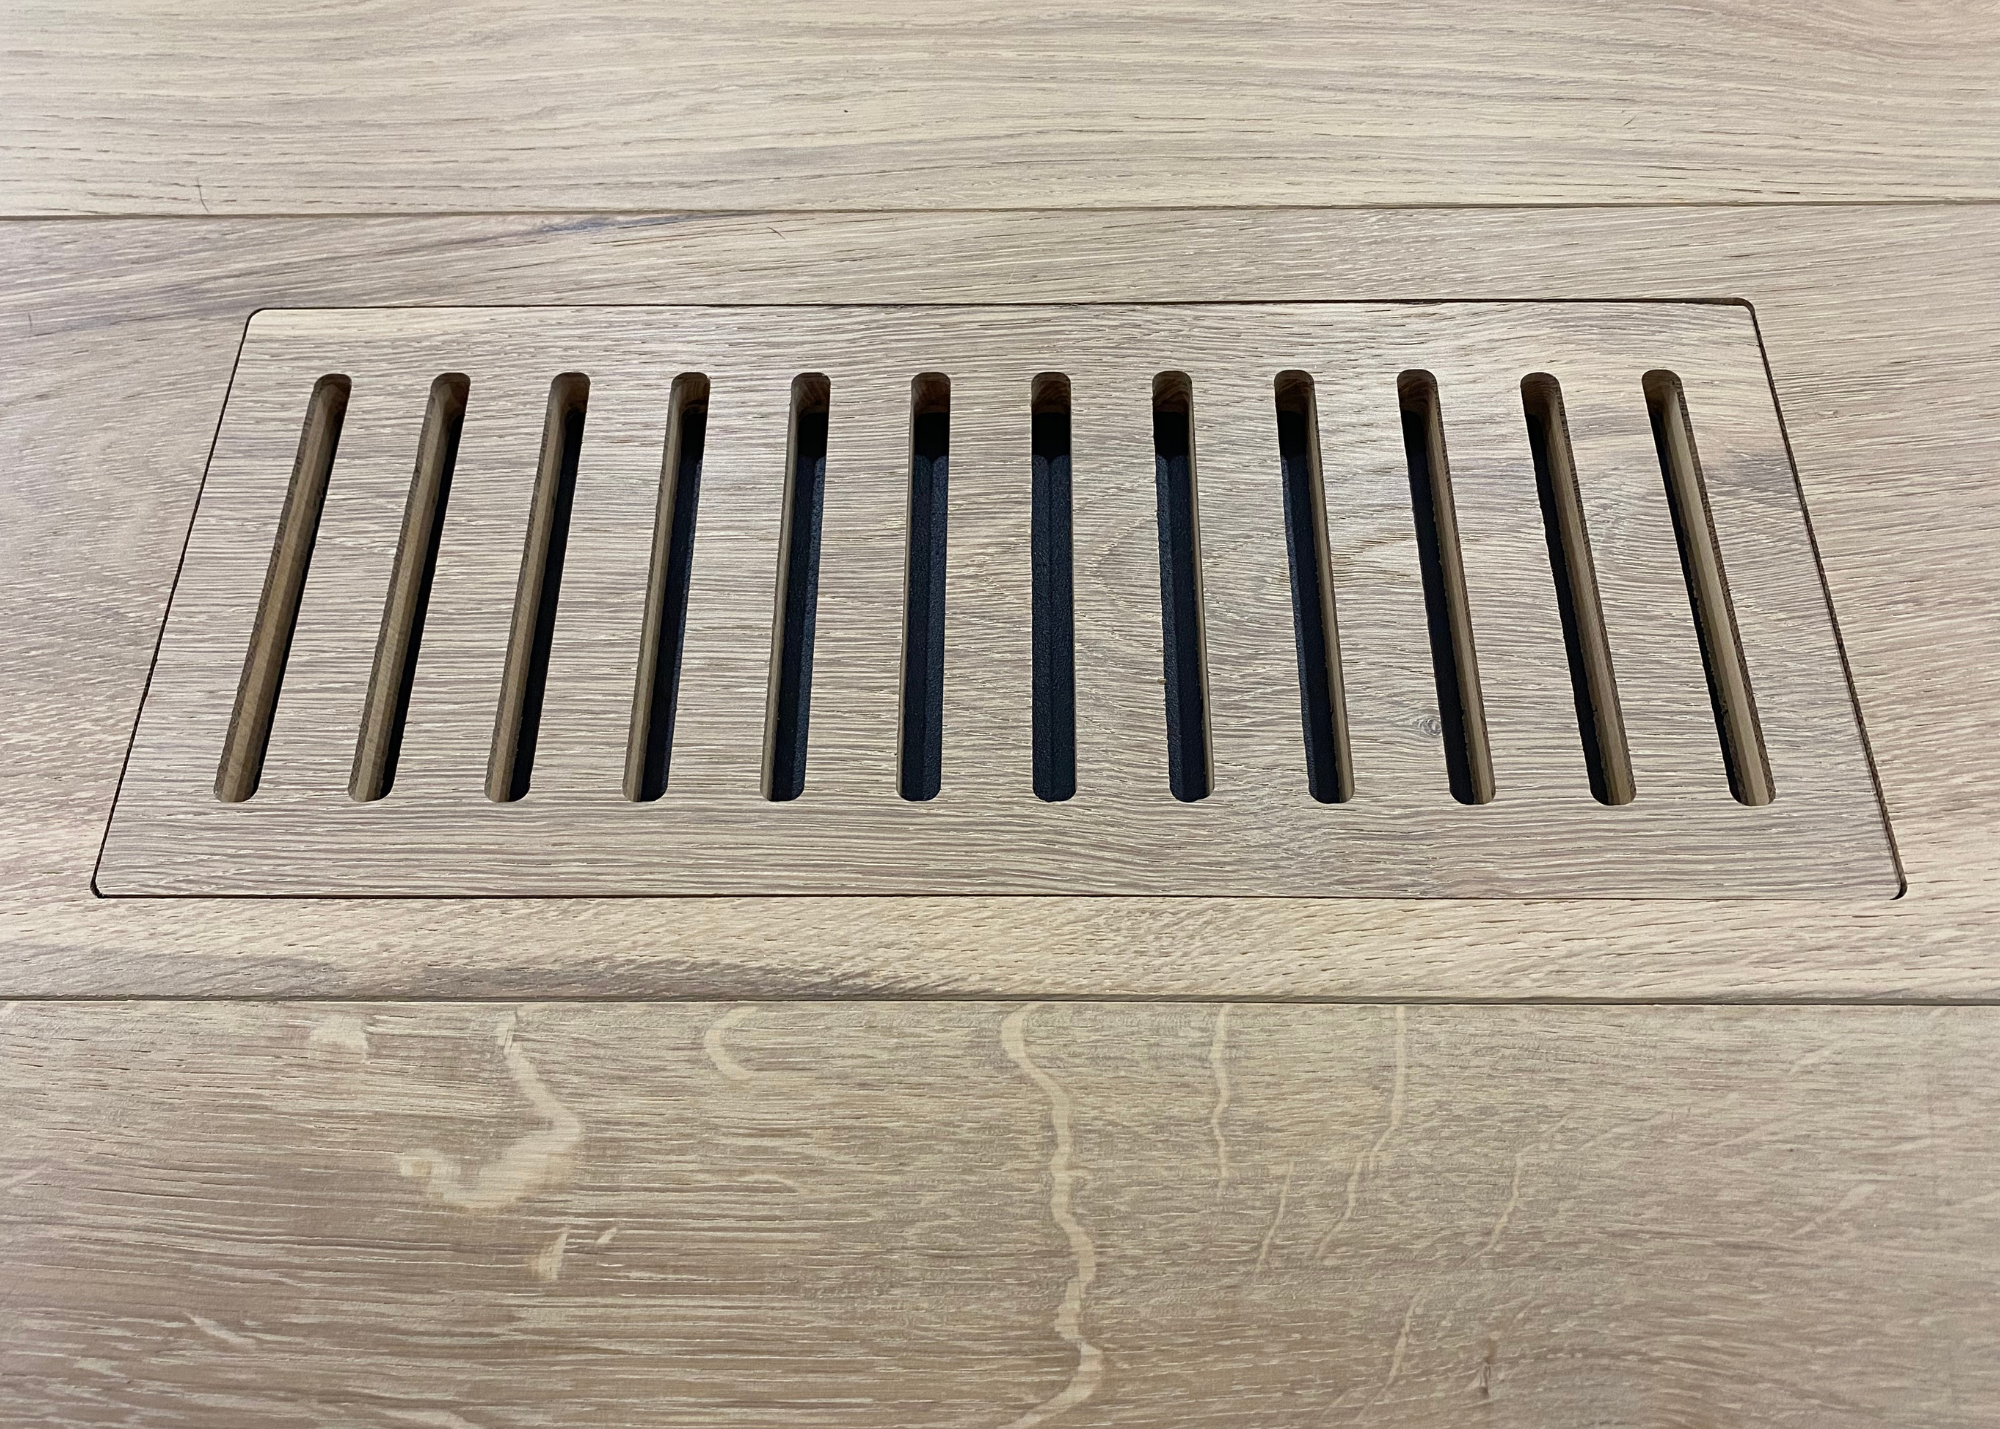
The Classic DIY floor vent system is designed for seamless integration with engineered and LVP flooring, allowing installers to create custom floor vents using the actual flooring material on-site.
For Engineered & LVP Flooring
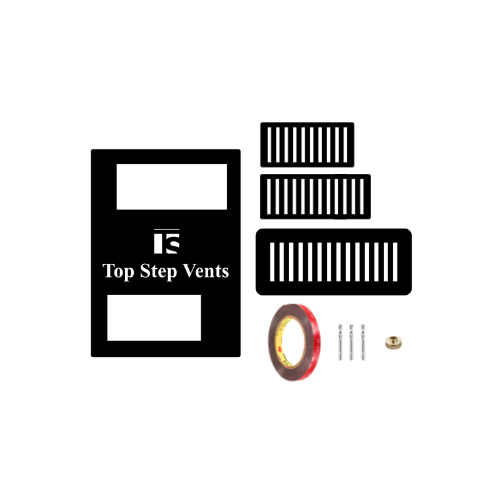


How To Use to Classic DIY Vent System
Watch the above video on how to use our Classic DIY Vent System. Below we have it broken out step by step on how to create your vent out of your flooring.
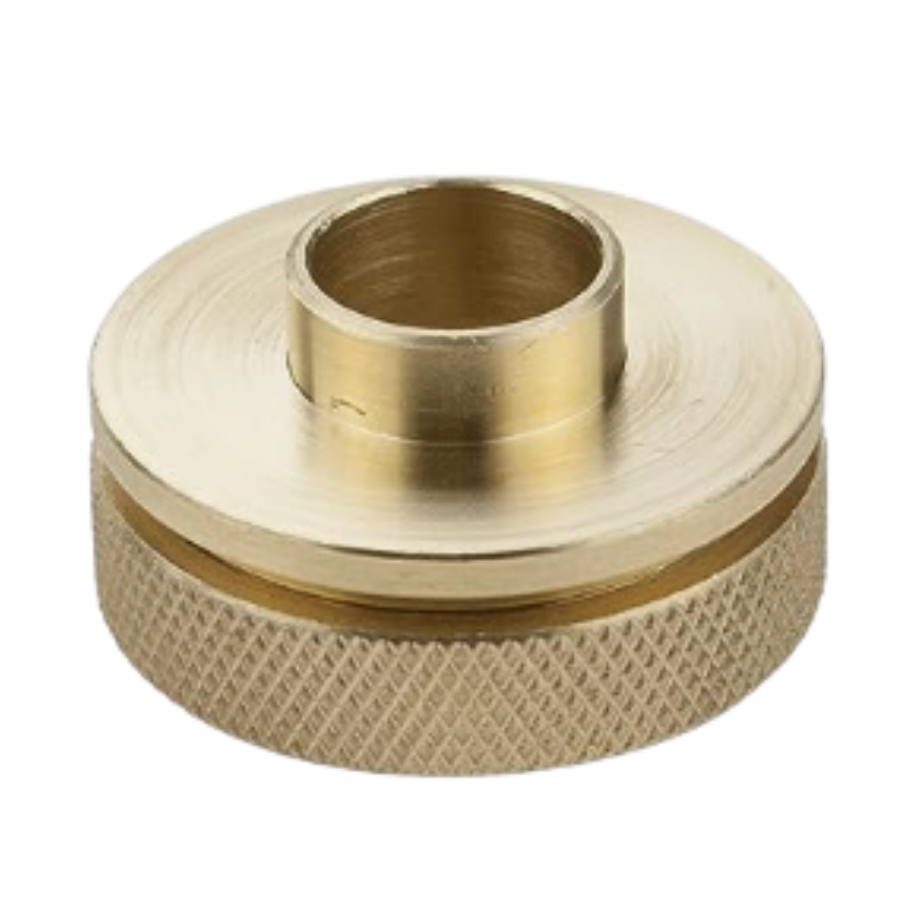
For LVP flooring, a support plate is needed to keep the vent from relaxing into the duct.
-

Step 1:
Square your Two Hole Template to the floor.
*This is the same template you would use on our metal flush mounted vents.
-

Step 2:
Use a plunge router to router out the hole. This is where the vent will cover the duct.
*We recommend to do a few passes, each a little deeper into the material.
-

Step 3:
Grab an extra piece of flooring that you want to cut the vent out of. Take our DIY Vent Template and adhere the template to the flooring using double sided sticky tape.
-

Step 4:
Use a plunge router to router out the vent starting with the slates, and ending with the outer edge.
*Again, we recommend doing a few passes, each time cutting a little deeper into the material.
-

Step 5:
Take your newly cut vent and place it in the hole that you cut in step 2.
*For vinyl material, slide our Vent Support Plate under the flooring before placing the vent over it.
About the Classic DIY Vent System
The Classic DIY floor vent system is designed for seamless integration with engineered and LVP flooring, allowing installers to create custom floor vents using the actual flooring material on-site. With clean linear slots and a timeless design, Classic blends effortlessly into any interior while maintaining a refined architectural look. Built around a precision template system, it simplifies installation while delivering a flush mount finish that feels built-in, not added—making it an ideal solution for high-end residential and custom home projects.